How to Set Up Google Workspace Email on Your Domain Correctly (MX, SPF, DKIM and DMARC)
Set up Google Workspace email on your own domain the right way: verification, the MX record, SPF, DKIM in the Admin console and DMARC, without breaking website mail.
You signed up for Google Workspace so you can have you@yourbusiness.com in Gmail. The setup wizard asks you to verify your domain, then change MX records, then talks about SPF, DKIM and DMARC. Get it slightly wrong and the results are confusing: mail still lands in the old host’s mailbox, messages to Gmail go to spam, your website’s contact form stops reaching you, or the Admin console shows “Not authenticating email” in red.
This guide walks through each record in the right order and shows how to prove every step worked, so the switch to Google Workspace is boring in the best way. It is written for business owners and the designers who set up email for clients. If your website and email are at different providers, the separate guide on splitting DNS records between providers covers the general layout; the separate guide on email going to spam after a DNS change covers authentication failures in depth.
What is happening
Your domain’s DNS zone tells the world two different things about email: where to deliver mail for your domain (MX records) and which servers are allowed to send as your domain (SPF, DKIM and DMARC). Google Workspace needs both set correctly, plus a record proving you own the domain.
Lets receivers verify Google’s signature on your mail
DMARC
TXT at _dmarc
v=DMARC1; p=none; rua=mailto:REPORT_ADDRESS
Tells receivers what to do when checks fail, and where to send reports
One MX record or five
Google now gives new customers a single MX record, smtp.google.com with priority 1. Older setups use five records, and Google has said these continue to work.
Priority
Legacy MX value
1
ASPMX.L.GOOGLE.COM
5
ALT1.ASPMX.L.GOOGLE.COM
5
ALT2.ASPMX.L.GOOGLE.COM
10
ALT3.ASPMX.L.GOOGLE.COM
10
ALT4.ASPMX.L.GOOGLE.COM
Use one set or the other, never a mix, and never alongside MX records from a previous provider. Google’s Admin Help page on MX record values is the authority; check it at support.google.com before you publish, because values have changed before.
Before you start
You need a Google Workspace super admin account and login access to wherever your DNS is hosted. That is not always your registrar: if your domain uses Cloudflare or your web host’s nameservers, edit records there. Find out with dig NS example.com +short.
Export or screenshot your current DNS zone before you change anything. If you already have mailboxes elsewhere, plan the mail migration first; the separate guide on moving email to a new provider covers that. This guide assumes you are switching delivery to Google.
All checks run on your own computer. macOS and Linux have dig built in. On Windows, use Resolve-DnsName in PowerShell (shown where it differs) or install WSL and use dig. If your website is WordPress and you have SSH access, website mail checks run in the site folder containing wp-config.php, using wp or wp-cli depending on the host. The diagnostic tools page also links web-based DNS checkers.
Step 1: Lower TTLs and record what exists
A day before the switch, lower the TTL on your existing MX and SPF records to 300 seconds (5 minutes) so that, if something goes wrong, a fix spreads quickly. Then capture the current state.
Replace example.com with your domain. +noall +answer shows only the answer lines, including the TTL (the number after the name); +short shows only the values. On Windows: Resolve-DnsName example.com -Type MX and Resolve-DnsName example.com -Type TXT. Save this output. You will compare against it later, and it is your rollback plan. Note any existing SPF record (starts v=spf1): you must edit it, not add a second one.
Step 2: Verify the domain
In the Google Admin console the setup flow gives you a TXT value beginning google-site-verification=. Add it as a TXT record at the root of your domain (the host is usually @ or left blank). Keep any existing TXT records; a domain can have many.
grep filters the TXT values to the verification token. Good: the token you were given appears exactly. Nothing returned means the record is not published yet, was added to the wrong zone, or was created as example.com.example.com because the DNS panel appended your domain to a host you typed in full. Once the record resolves, click Verify in the Admin console. Verification sometimes takes a while to be recognized even after the record is visible; wait and retry rather than adding duplicates.
Step 3: Point MX records at Google
Delete every existing MX record for the root of the domain, then add Google’s. For the current single-record setup that is host @, type MX, priority 1, value smtp.google.com. Some DNS panels want a trailing dot (smtp.google.com.); some combine priority and value into one field. If yours only allows one MX record, this setup suits it.
dig example.com MX +short
Good output is exactly one line, 1 smtp.google.com., or exactly the five legacy lines. Bad output includes your old host’s mail server, a record such as mail.example.com or a mix of old and new: some senders will keep delivering to the old server. Then, in the Admin console, complete the “Activate Gmail” step so Google starts accepting mail for the domain.
Confirm delivery
From a personal account at a different provider, send a test message to a Workspace address. It should arrive in Gmail within minutes once caches expire. If it lands in the old host’s webmail, a resolver is still serving the old MX; wait for the old TTL to pass and check again.
Step 4: Publish SPF
SPF lists who may send email as your domain. If Google is your only sender, the record is:
v=spf1 include:_spf.google.com ~all
This is the value of a single TXT record at the root. include:_spf.google.com authorizes Google’s sending servers; ~all (soft fail) says other senders are not authorized but should not be rejected outright. Most small businesses also send from other places, so add each one to the same record, for example v=spf1 include:_spf.google.com include:SENDER_INCLUDE ~all, where SENDER_INCLUDE is the include value your newsletter, invoicing or transactional email service documents.
dig example.com TXT +short | grep spf1
Good: exactly one line starting "v=spf1 containing include:_spf.google.com. Bad: two lines starting v=spf1. Two SPF records make SPF fail with a permanent error for everything, so merge them. SPF also has a limit of ten DNS lookups; every include counts, plus the includes nested inside it, so do not add services you no longer use.
Step 5: Turn on DKIM in the Admin console
Until you set this up, Google signs your mail with a default Google domain rather than yours. That signature does not align with your domain for DMARC, which matters for deliverability and for the bulk sender rules at Gmail, Yahoo and Outlook.
Generate the key
In the Admin console go to Apps, then Google Workspace, then Gmail, then Authenticate email.
Select your domain and click Generate new record.
Choose a 2048-bit key if your DNS host accepts long TXT values. Leave the prefix selector as google unless that name is already used by another service in your zone.
Copy the TXT record name (google._domainkey) and the value.
If you try this immediately after signing up, Google may report that the DKIM record could not be created. Gmail must be fully active on the domain first; wait and try again later.
Publish and start authenticating
Add a TXT record with host google._domainkey and the value you copied. A 2048-bit key is longer than 255 characters, the maximum for a single DNS text string. Many DNS panels split it automatically; some require you to paste it as several quoted strings in one record; a few cannot handle it at all, in which case use a 1024-bit key. Then check it from your computer.
dig google._domainkey.example.com TXT +short
Good output starts "v=DKIM1; k=rsa; p= followed by a long key, possibly in several quoted chunks that join without spaces. Bad: nothing (wrong host, often google._domainkey.example.com.example.com), or a key that stops early because the panel truncated it. When it resolves, return to Authenticate email and click Start authentication. The status should change to show the domain is authenticating email.
If you ever click Generate new record again, Google creates a new key under the same selector. The DNS record must be updated to match, or every message will fail DKIM.
Step 6: Add DMARC
DMARC ties SPF and DKIM to the domain in your From address and tells receivers what to do when both fail. Start in monitoring mode.
v=DMARC1; p=none; rua=mailto:REPORT_ADDRESS
This is the value of a TXT record with host _dmarc. p=none asks receivers to take no action yet; rua is where aggregate reports go, and REPORT_ADDRESS should be a mailbox or report-processing service you actually read. After a few weeks of reports showing all your legitimate mail passing, move to p=quarantine and later p=reject. Reading those reports and handling spoofing are covered in the separate guide on DMARC reports; the full rules from the big mailbox providers are in the separate guide on Gmail, Yahoo and Outlook sender requirements.
dig _dmarc.example.com TXT +short
Good: a single line beginning "v=DMARC1;. Bad: two DMARC records, or one published at the root instead of _dmarc.
Step 7: Keep website email working
Moving mail to Google often breaks the website’s own email in two ways.
The web server still thinks it handles your mail
If your website host used to provide your email, its mail server may still believe it is responsible for your domain. When the website sends a form notification to you@example.com, the server delivers it to the old local mailbox instead of looking up MX records, and you never see it. In control panels this is usually a setting called email routing or mail exchanger: set it to remote, so the server follows your MX records. If you cannot find it, ask your host to set your domain’s mail routing to remote. Test by submitting your contact form and checking Gmail.
The website is not an authorized sender
If WordPress sends mail through the web server with a From address on your domain, that server is now not covered by an SPF record that only includes Google, and it cannot sign with your DKIM key. Messages may land in spam or be rejected once DMARC is enforced. The most reliable fix is to send website mail through an authenticated service: an SMTP plugin connected to a transactional email service with its own DKIM, or Google’s SMTP with an app password or relay settings for low volume. Setting this up is covered in the separate guide on WordPress not sending email.
To confirm what WordPress is doing, send a test from the server over SSH.
wp eval 'var_dump( wp_mail( "YOUR_TEST_ADDRESS", "Workspace test", "Sent from the website after the Google Workspace switch." ) );'
Run this in the site folder. Replace YOUR_TEST_ADDRESS with a Gmail or Workspace address you can open. wp eval runs the PHP inside WordPress. bool(true) only means WordPress handed the message on; the real test is whether it arrives and what its authentication results say (Step 8). bool(false) means sending failed before leaving the server.
Step 8: Test end to end
Send a message from your Workspace mailbox to an address at a different provider, ideally another Gmail account. Open it, choose the three-dot menu, then Show original. Google displays a summary at the top.
SPF: PASS with your domain or a Google IP address.
DKIM: ‘PASS’ with domain example.com. If it shows a Google domain instead of yours, Step 5 is not finished.
DMARC: ‘PASS’.
Repeat with a message sent by your website (a form notification). Its results tell you whether website mail is authenticated. Google’s Admin Toolbox Check MX tool (toolbox.googleapps.com) also checks the records for your domain and highlights common mistakes.
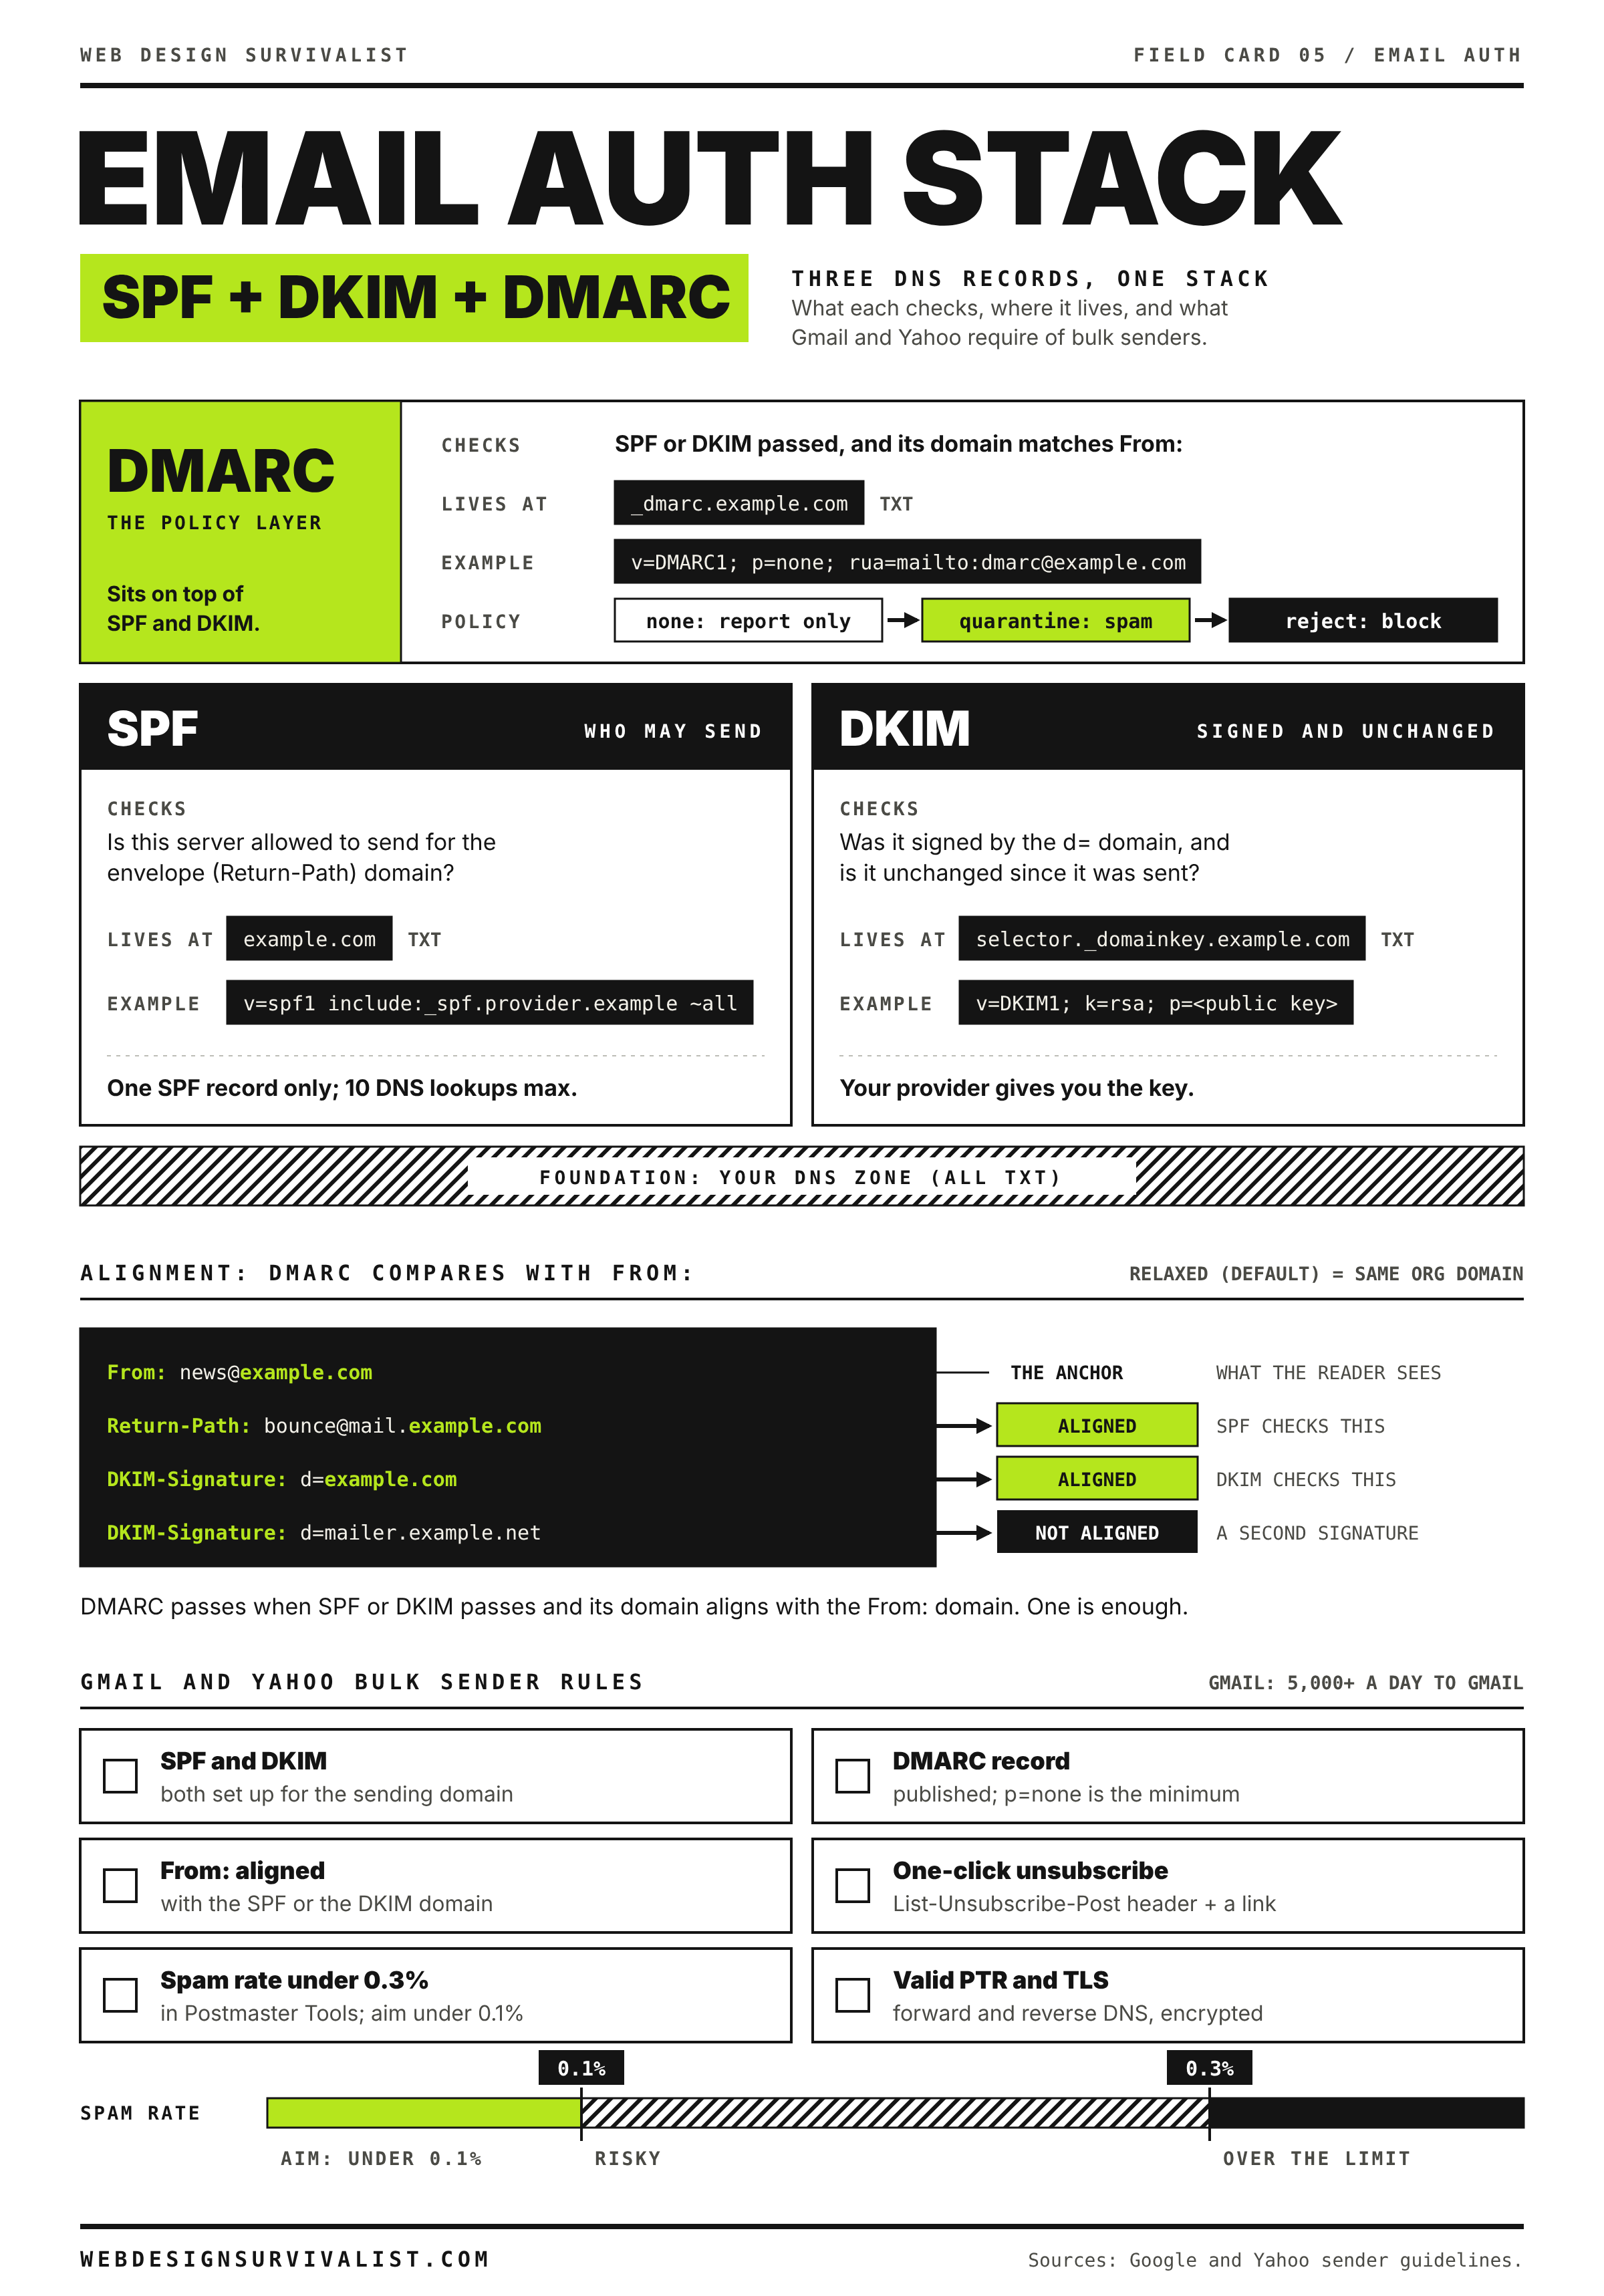
Field card 05: Email authentication stack: SPF, DKIM and DMARC. Print it on any black and white printer. All field cards
Advanced: aliases, groups and extra domains
A few setups trip up experienced admins.
Secondary domains and alias domains: each domain added to Workspace needs its own verification, MX records, SPF, DKIM key and DMARC record. Authenticate email lists each domain separately, and each must be generated and started on its own.
Subdomains that send: a marketing tool that sends from news.example.com needs SPF and DKIM on that subdomain. DMARC at the root covers subdomains by default unless you add an sp= tag.
Selector clashes: if another service already uses google._domainkey, choose a different prefix when generating. The selector in the DKIM signature header (s=) tells you which record receivers look up; Show original displays it.
Reading a DKIM-Signature header: in the raw message, d= is the signing domain and must match or be a parent of your From domain for DMARC alignment; s= is the selector. A header with d= ending in a Google domain means Google is signing on its own behalf, not yours.
Restoring TTLs: once everything has been stable for a few days, raise MX and SPF TTLs back to an hour or more to reduce lookups.
When to contact your host
Contact Google Workspace support for Admin console problems such as verification not completing or DKIM failing to generate. Open a ticket with your web or DNS host when:
your DNS panel cannot publish a long TXT record or keeps altering record names;
website mail is still delivered to an old local mailbox after the MX change;
outgoing website mail is blocked or rejected.
Send the domain, your dig output for MX, SPF, DKIM and DMARC, the time of the change and of a failed test in UTC, and the full headers of a test message showing the authentication results. If mail has stopped entirely and you need a fast path, start at the Emergency Room.
Did this fix it?
Still stuck? Start again from what you can see in the Emergency Room.
Still stuck?
Print a free one-page checklist to keep, or open the Emergency Room if the symptom does not match.
The new website is live but email has stopped. Changing nameservers moved your whole DNS zone, and the MX, SPF, DKIM and autodiscover records did not come with it. Here is how to put them back.
Microsoft 365 from GoDaddy signs you in through GoDaddy and locks down the admin center. Learn how to confirm federation, weigh your options and move away in an order that keeps mail flowing.
Switching email providers? Plan the move, copy old mail first, cut over MX in the right order, catch stragglers on the old server and check for bounces afterward.